Showing posts with label Cupcakes. Show all posts

3/17/14

Oreo Mint Chocolate Cupcakes


It's St. Patrick's Day!  I almost forgot about this fun holiday until K1's teacher sent a note home about it and asked if anyone was bringing treats.  Heck to the yeah!  Holidays during the school year give me the opportunity to create new cupcake ideas without having 2-3 dozen cupcakes lingering around my house for a week.  This way, I get to send 2 dozen to her class, and I get to keep a few for us.


This time, I already had an idea of what I wanted to do, and it involved Oreos.  I've always wanted to try putting a cookie at the bottom of a cupcake to see how it would affect it.  Mint Oreos were the logical choice for today - uh, they're green?  And ever since the Girl Scouts broke out their card tables in front of Smith's, I've been dying for a mint chocolate cookie.  Problem solved.


The cupcakes turned out perfect and the cookie didn't get soggy.  The cupcakes didn't fall (which I half way thought they might), they stayed light and fluffy.  And 1/2 tsp. of mint in both the cake batter and the frosting was just right.  I'm glad they made it through the night and into K1's classroom.  Props to The Hubs for some serious self control.


Oreo Mint Chocolate Cupcakes


Ingredients:


1 box chocolate cake mix
1 small box chocolate instant pudding
3/4 cup milk
1 cup canola oil
4 eggs
1/2 tsp. peppermint extract
1 package mint Oreos

Frosting:

1 cup unsalted butter (2 sticks)
4-5 cups powdered sugar
4-5 Tbs. milk
1/2 tsp. peppermint extract
Green food coloring

Directions:

1. Preheat oven to 350 degrees.  Line a muffin pan with cupcake liners.

2. In a stand mixer, combine cake and pudding mix. Turn mixer on to low and gradually add milk and oil.  Add eggs, one at a time until combined.  Add peppermint extract.  Scrape sides of bowl and mix on low for a few more seconds.

3. Place one Oreo in each cupcake liner.  Add about 2 Tbs. of cake batter on top of Oreo - liner should now be about 3/4 full.  Lightly tap pan on counter to allow batter to settle around cookie.

4. Bake for 20-22 minutes.  Remove from oven and allow to cool for 10 minutes in pan.  Remove cupcakes to a cooling rack and allow to cool completely.

5. While cupcakes are cooling, make frosting.  In another large bowl, using a hand beater, beat butter and peppermint extract until smooth.  Add 1 cup of powdered sugar and mix on medium speed until combined.  Add 1 Tbs. milk and beat again.  Continue to add powdered sugar and milk, 1 cup and 1 Tbs. at a time, until desired consistency is reached.  Add food coloring and beat on high until fluffy.  Pipe onto cupcakes and top with green sprinkles, if desired.

Makes 24-30 cupcakes
Enhanced by Zemanta
Continue Reading... »

2/12/14

Strawberry Cheesecake Cupcakes


I HAD to take a break from working this week to whip up some cupcakes for Valentine's Day.  Granted, I had to row an extra 2000m in order to enjoy one, but they are worth it.  I asked K1 what kind of cupcakes she wanted me to make for her class, and she requested something with strawberries.  So wandering around the baking isle, looking at the various pudding mixes, I stumbled across and idea that brought The Hubs to his knees.  Strawberry Cheesecake Cupcakes.


I didn't want the cupcakes to just be strawberry flavored.  I wanted chunks of strawberries in rich, white cake.  Adding cheesecake pudding and lemon extract gives it a little sour taste, but not too much.  Add the cream cheese frosting, and the cupcakes become something between cake and cheesecake.  The combination of the sour and sweet flavors makes them rich.


Strawberry Cheesecake Cupcakes


Ingredients:


1 pint ripe strawberries, washed
1 box white cake mix
1 small box Jello® cheesecake pudding
1 cup sour cream
1/2 cup water
1/2 cup canola oil
1/2 tsp. vanilla extract
1/2 tsp. lemon extract
4 eggs
Cream Cheese Frosting

Directions:

1. Preheat oven to 350 degrees.  Line muffin pan with cupcake liners or spray with nonstick cooking spray.

2. Chop strawberries into small pieces.  Set aside.

3. In a stand mixer, combine cake mix and pudding.  Mix on low to combine.  Add sour cream, water, oil, vanilla, lemon extract, and eggs.  Mix on low speed until all ingredients are incorporated.  Do not over mix.  Using a spatula, fold in strawberries.

4. Fill cupcake liners 2/3 full.  Bake for 20-25 minutes or until a toothpick inserted in center comes out clean.  Allow to cool in pan for 10 minutes, then remove to cooling rack to cool completely.

5. While cupcakes are cooling, prepare frosting.  Pipe onto top of cupcakes.  Keep chilled until ready to serve.

Makes 24 cupcakes
Continue Reading... »

11/19/13

A Lorax Birthday Party


This weekend is kind of a blur to me.  I told you all last Friday that K2 and I share our birthdays.  Well up until this year, we've had our birthday party together. But, with her getting to a certain age, she's to the point where she wanted to have a birthday party of her own with her own friends.  Sniff.  My baby is no longer a baby - at.all!

We debated for MONTHS over what kind of party she wanted to have.  Big sister had a cowgirl party back in September, and so she definitely wanted a cool theme.  We went back and forth between princesses, Ariel, Wreck it Ralph (yeah, she's pretty cool), and finally we decided on The Lorax.  She loves this movie and book.  Seriously one of her all time favorites.  And I knew exactly the type of cupcakes I was going to make for her.  Here's a glimpse into the party.


First of all, the decorations had to be bright colors.  With a lot of patterns.  Whenever I think of Seuss, I think of these things.  (Do you like the dog?  He refused to get out of the picture.  Little turd.)  And then I loved these honeycomb balls, very truffula tree-ish.  And of course the Lorax had to make a showing!


We had such a fun time at K1's party with the kids playing a "pin the tail" game.  So incorporating that into K2's party was easy - I call it Pin the Mustache on the Lorax!  It was very simple.  A little orange and yellow poster board from Michael's, some permanent markers, and a white paint marker later and our little rolley-pollie took shape.  For not getting great grades in art, he turned out not too shabby!


All the kids had a blast playing this game.  It helped that The Hubs was in charge spinning the kids around and then sending them off.  We had the mustache all over the place, including a human hip!  All the kids wanted multiple turns.  They also had little bags of "Barbaloot" - chocolate Teddy Grahams and mini-marshmallows - to snack on and toss in the air and catch with their mouths.


I wanted the kids to have some type of art project to take home and enjoy.  Candy is an easy handout, but kids love creating something that they can call their own.  For me, it was suncatchers.  I found individual flower suncatchers at Michael's, along with a box of paints and paintbrushes.  That was the biggest hit for the kids.  They all were able to mix paints and create their own little flower.  K2 mixed every single color for hers.


The favors were little metal buckets, filled with various Lorax items - a crazy straw with Lorax mustache attached, temporary tattoos of flowers and butterflies, bubbles, a marshmallow candy stick, a pen with truffula type fluff on it and a butterfly, and a packet of flower seeds that (to me) look like truffula trees.  I wanted to give each child a flower pot and have them plant a seed AT the party, but with the onset of winter, I thought it would be better to just send home a packet of seeds and let the kids plant them in the Spring.   On the buckets was a label with a line from the book.


And now for the cupcakes.  This was quite possibly one of the easiest cupcake ideas I've had.  It had to be fun, and I knew I wanted to make Truffula Trees for the toppers.  I used my cupcake base, using a Funfetti cake mix and vanilla pudding.  Then I made Cream Cheese Frosting and colored it with Wilton's Kelly Green gel coloring.  The truffula trees are made out of cake pop sticks and cotton candy.  And of course I had to add the little Barbaloot Bears, chocolate Teddy Grahams.  They turned out so dang cute and just perfect for our little party.


It was a fun and simple party.  One that I was okay with just sitting back and watching while my baby girl grows up.


Continue Reading... »

11/1/13

School Lunch and Meal Plan


Happy first day of November!  Are your kids on a sugar high like mine are?  Holy cow.  I'm so glad that our school is out for the weekend.  Before I get into the lunches I made this week, I just have to share the cupcakes that I made for K1's class yesterday.  Seriously, these turned out so cute and so stinking easy!


I used my Chocolate Chocolate Chip Cupcake and Cream Cheese Frosting recipes.  I put the frosting in a gallon size ziploc bag and then cut the tip off one of the corners.  I piped them on this way because I didn't want them to be exact and equal.  I wanted them to have a weird shape and be a little different, like ghosts!  Then I just added some mini semi-sweet chocolate chips for the eyes, and jumbo semi-sweet chocolate chips for the mouths.  SO EASY!  And so fun.  They were a huge hit in class.  Okay, now onto the lunches:


**Note: We had our church trunk or treat last weekend, so K1 got a piece of her candy in each of her lunches this week.

Day 1 - Ham and Cheese Sandwich on whole wheat bread, Broccoli and Ranch Dip, Grapes, Halloween Candy.

Day 2 - Tuna Fish and Provolone Cheese on whole wheat bread, Carrots and Ranch Dip, Grapes, Halloween Candy.

Day 3 - Grilled Cheese Sandwich on whole wheat bread, Cambell's® Tomato Soup (which has a full serving of vegetables!), Sliced Strawberries, Halloween Candy.

Day 4 - Happy Halloween!  Peanut Butter Bats (PB & Honey on Whole Wheat Bread). Witch Fingers and Essence of Ghost (Carrots and Ranch Dip).  Pureed Monster Brains (Del Monte® Fruit and Veggie Puree, Peach Mango).  Halloween Candy.

Day 5 - Today, K1 and I have a Parent Teacher Conference.  So I'm taking this opportunity to send K2 to a friend's house, and spending the morning with K1 for a mommy-daughter date.  After our conference, we're going Christmas shopping (OH YEAH!) and then to Raising Cane's for a little lunch.  One of our favorite places to eat.  Why?  Because "THE SAUCE IS BOSS!"

Remember, you can follow me on Instagram to get daily updates on school lunches.


I have to be honest with you.  I'm kind of in a cooking funk right now.  I think between the holidays fast approaching (I didn't even get Halloween decor out this year because I've been so busy!), being busy with home decrapification, helping out at K1's school, and other such nonsense, I'm just burning the candle at both ends.  But be patient with me.  I always have a fire that lights under me right between my birthday (I'll be 25 again this year, plus a few more, but hey, who's counting!?) and New Years.  So if my meals seem a little boring, it's only because I'm just trying to push through the funk and NOT EAT OUT hardly at all.  That's my mantra for the next 10 weeks - DON'T EAT OUT MORE THAN ONCE A WEEK!  Hey, I still need my free day.

Saturday: FREE DAY!  WOO HOO!
Sunday: Slow Cooker Chicken with White Sauce, Mashed Potatoes, Tossed Salad (Recipe to follow)
Monday: Brinner! Pancakes, Fried Eggs, Bacon
Tuesday: Fish Tacos
Wednesday: Clam Chowder and Sourdough Bread
Thursday: Chicken Pot Pie
Friday: Pizza, Steve. (If you can name this movie, you are officially cool.)

Have a great first weekend of November!  See you Monday!
Continue Reading... »

9/9/13

Cookies and Cream Cupcakes


We had a birthday over the weekend! And did we ever celebrate.  My K1 is another year older, I just cannot believe it.  We had a cowgirl party for her, complete with horses galore.  We made wanted posters and played pin the tail on the horse.  But the part that I am excited to share with you is the cupcakes.  A tradition that I've started in our family is that they birthday person gets to pick their flavor of cupcake.  This year, K1 has a love for cookies 'n' creme chocolate bars, and wanted me to make those for her.


Hm. Okay, something I never attempted.  Sweet!  So I went to the grocery store to check out the cake mixes and other ingredients.  And guess what - they don't make a white chocolate cake mix!  Yes, I was just as shocked as you are now.  So I knew I had to improvise.  Luckily, I found a Ghiradelli White Chocolate baking bar.  And I wanted nice chunks of Oreos in the cupcakes themselves, so I tossed them into the food processor and just pulsed a couple of times to make sure they weren't too small.


I used my Cream Cheese Frosting recipe, processed the Oreos until they were crumbs, and simply folded them into the frosting.  The cupcake turned out so nice and light, while the frosting was thick and rich.  They key with the cream cheese frosting is that if you want a stiffer frosting, you simply add more powdered sugar.  For every cup of powdered sugar you add, make sure you add 1 Tbs. milk.


Cookies and Cream Cupcakes


Ingredients:


1 box white cake mix
1 small box white chocolate instant pudding mix
1 bar Ghiradelli white baking chocolate, chopped into tiny pieces
12 Oreo cookies, broken up into small chunks
1 cup sour cream
1 cup canola oil
1/2 cup water
1 tsp. vanilla
4 eggs

Frosting:

1 package cream cheese, softened
1/2 cup butter, softened
1 tsp. vanilla
4 cups powdered sugar
4 Tbs. whole milk
6 Oreo cookies, processed into crumbs

Oreo crumbs for topping

Directions:

1. Preheat oven to 350 degrees.  Line a muffin pan with cupcake liners. 

2. In a large bowl, mix together cake mix, pudding, sour cream, oil, water, vanilla, and eggs.  Fold in white chocolate pieces and Oreos chunks.  

3. Fill each liner 2/3 full with batter.  Bake for 18-22 minutes.  Remove from oven and allow to cool in pan for 10 minutes, then remove to a cooling rack.  Once cooled completely, place in refrigerator to chill.

4. Make frosting.  In a large bowl, cream together butter and cream cheese.  Add 2 cups of powdered sugar and mix on low speed.  Add vanilla and 1 Tbs. milk.  Mix on medium speed.  Add 1 cup of powdered sugar.  Mix on medium speed.  Add another Tbs. of milk.  Mix on medium speed.  Add remaining cup of powdered sugar.  Mix on high speed.  Add milk, 1 Tbs. at a time, until desired consistency is reached.  Fold in Oreo crumbs.  Pipe onto cupcakes.  Sprinkle with remaining Oreo crumbs and keep refrigerated.


Makes 24 cupcakes
Continue Reading... »

7/3/13

Red White and Blue Ice Cream Cupcakes


It's Independence Day!  And I'm here to share with you a recipe that displays our patriotic colors, and some fantastic ice cream from Breyers®.  I love doing a good old fashioned barbecue for dinner on the fourth of July, but I do so love a little red white and blue splashed into my meal.  The easiest way to do that is in dessert.


When I was thinking about what I would make this year, ice cream kept coming to my mind.  With all this heat going around the West, who wouldn't?  It is so blessed hot that all I can do is eat frozen items.  And have you seen the lineup of flavors Breyers® has to offer?!  Oh.My.YUMMERDELICIOUS!  Yes, that is a word. In our dictionary at least.


Now, how to implement the other 2 colors.  Well, it was staring me in the face this entire year.  Cupcakes!  Half a batch blue, half a batch red.  Cut them in half and combine the two colors and some Breyers® Natural Vanilla Ice Cream. Mini ice cream cakes.  Single servings. Yay!  And we have patriotic bliss.  And I get my cake and ice cream at the same time.


Red White and Blue Ice Cream Cupcakes


Ingredients:


1 box white cake mix
1 small box white chocolate instant pudding mix
1 Tbs. baking cocoa
4 eggs
1 cup buttermilk
1/2 cup canola oil
Red Gel Food Coloring
Royal Blue Gel Food Coloring
Breyers® Natural Vanilla Ice Cream
1 can whipped topping

Directions:

1. Preheat oven to 350 degrees.  Line a muffin pan with cupcake liners.

2. In a large bowl, combine cake mix, pudding mix, cocoa, eggs, buttermilk, and oil.  Mix on low speed until moistened, then increase to medium speed to combine ingredients until smooth.

3. Separate mixture into 2 parts in 2 separate bowls.  In one bowl, add red food coloring until desired colored is reached.  In other bowl, add blue food coloring until desired colored is reached.  Pour mixture into liners, one color at a time.

4. Bake for 20-22 minutes or until tops of cupcakes spring back when tapped lightly.  Allow to cool in pan for 10 minutes, then remove to a cooling rack to cool completely. Repeat with other color.

5. When cupcakes have cooled completely, remove from liners and slice in half.  Separate into bottoms and tops.  Allow ice cream to soften slightly.  Re-line muffin tin with cupcake liners.  Place a blue bottom half in liner.  Press a scoop of ice cream onto bottom half.  Top with a red top half.  Repeat with remaining cupcakes until pan is full.  Place in freezer for at least an hour.

6. When ready to serve, top with whipped topping.

Makes 24 cupcakes


Follow me on Google+


This post was created in connection with my appointment as an Ambassador in the 
Breyers Blogger Program. Visit www.facebook.com/breyers to join the  conversation.

Head on over to find out more about this month's sponsor!
#sponsored #partner

Breyers
Continue Reading... »

6/23/13

Orange Creamsicle Cupcakes


Creamsicles are a treat of my childhood.  When I was a child though, we only had chocolate and banana.  Since then, they've introduced strawberry, orange, mint, egg nog, peppermint, and low fat varieties.  When summer hits, so does my cravings for a yummy, frozen treat.  And if I can hide a box of creamsicles in the freezer, I'm good to go for a couple of weeks.  While chocolate appeals to me most, I can't help but stash a few boxes of the fruity kinds during the summer.


So, naturally, I set out on a mission to create a cupcake that would imitate these lovely frozen, creamy delights.  They are light and refreshing, but still rich enough to call a cupcake.  Of course, you can't have a fruity cupcake without a little Cream Cheese Frosting!  Introduce cupcake coma......now.


Orange Creamsicle Cupcakes

Ingredients:


1 box white cake mix
1 package instant lemon pudding
1/2 cup orange juice
1/4 cup water
1/2 cup sour cream
1/4 cup canola oil
3 eggs
1/2 tsp. vanilla extract
Orange food coloring
Cream Cheese Frosting

Directions:


1. Preheat oven to 350 degrees.  Line muffin pan with cupcakes liners.

2. In a large bowl, combine all ingredients except food coloring. Mix on low until batter is moistened.  Add food coloring until desire color is reached, and then mix on medium for 2 minutes.  

3. Fill liners 2/3 way full with batter.  Place in oven and bake for 18-22 minutes until cupcakes spring back when touched lightly.  Remove pan from oven and allow cupcakes to cool in pan for 10 minutes, then remove to cooling rack to cool off completely.

4. Frost with Cream Cheese Frosting.

Makes 24 cupcakes
I was Featured on Sweet 2 Eat Baking
Continue Reading... »

6/10/13

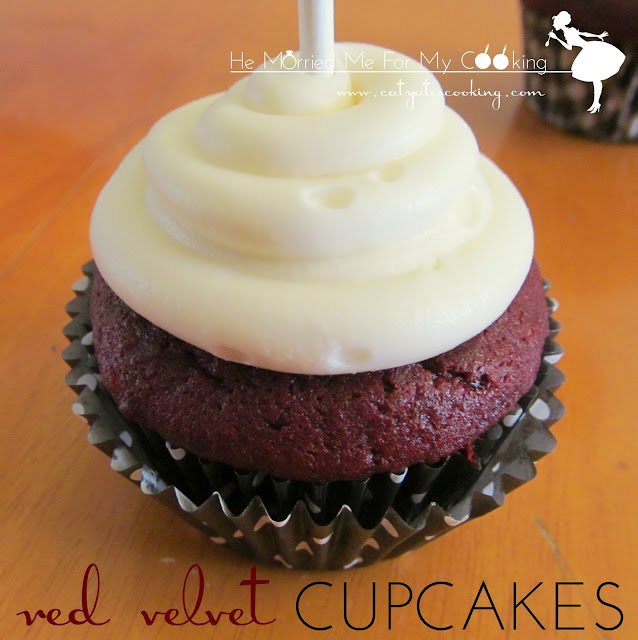
Red Velvet Cupcakes


What a crazy, whirlwind weekend we've just had.  Good thing I had some cupcakes to make it a little easier!  We had a celebration for my nephew, who is leaving on a mission for our church for 2 years.  So I wanted to make some cupcakes that would reflect him and be his favorite colors.  Red Velvet.  


This time though, instead of using sour cream in my mix, I decided to try vanilla Greek yogurt, just to mix things up and keep it a little healthier.  (Isn't that an oxymoron?  Cupcakes and healthy?)  The Greek yogurt made the red velvet that much richer.  Top it off with my Cream Cheese Frosting, and it was just divine.  Rich, but not heavy.  And definitely a treat.


Red Velvet Cupcakes


Ingredients:

1 box red velvet cake mix
1 small package instant chocolate pudding
1 (8 oz.) container vanilla Greek yogurt
1/2 cup water
1 cup canola oil
4 eggs

Directions:

1. Preheat oven to 350 degrees.  Line muffin pan with cupcake liners.

2. In a stand mixer or large bowl, add all ingredients.  Combine ingredients on low speed until moistened.  Then mix on medium speed for 2 minutes.

3. Using an ice cream scoop or spoon, fill liners 2/3 full.  Bake for 18-22 minutes or until tops bounce back when lightly tapped.  

4. Remove from oven an allow to cool in pan for 10 minutes.  Then remove cupcakes to cooling rack to cool completely.  Frost with cream cheese frosting when cooled.  Keep refrigerated.

Makes 24 cupcakes
Continue Reading... »

5/30/13

Key Lime Cupcakes


What calls out to me more than sunscreen when the hot temps hit?  Key Lime anything.  I love the sweet and tart combination of this citrus fruit.  I was first introduced to Key Lime at a restaurant here in Vegas.  I was pregnant, VERY PREGNANT, in the thick of summer, and I had a huge craving for Mexican food.  This one particular evening, they were serving Key Lime Cheesecake for dessert and we simply could not resist.  I was instantly smitten with the flavors and how refreshing it was.


The best part about this recipe is that it's fast, it's easy, and it only requires a few ingredients. It uses my cupcake base recipe with a lovely tart twist to it.  A cake mix, a pudding mix, a few wet ingredients, and voila!  The only downside is that you won't want to share.  Instead of topping it with a Key Lime frosting, I opt for my cream cheese frosting to mix up the flavors just a bit.


Key Lime Cupcakes


Ingredients:

1 box white cake mix
1 small package instant lemon pudding mix
1/2 cup water
1/2 cup key lime juice
1/3 cup canola oil
3 eggs
1/2 tsp. vanilla extract
Green food coloring

Directions:

1. Preheat oven to 350 degrees.  Line muffin pan with cupcakes liners.

2. In a large bowl, combine all ingredients except food coloring. Mix on low until batter is moistened.  Add food coloring until desire color is reached, and then mix on medium for 2 minutes.  

3. Fill liners 2/3 way full with batter.  Place in oven and bake for 18-22 minutes until cupcakes spring back when touched lightly.  Remove pan from oven and allow cupcakes to cool in pan for 10 minutes, then remove to cooling rack to cool off completely.

4. Frost with Cream Cheese Frosting.

Makes 24 cupcakes
Continue Reading... »